Find all relevant information to use DaSCR-Board here!
This the multi-page printable view of this section. Click here to print.
DaSCR-Board
- 1: Overview
- 2: Getting Started
- 2.1: Prerequirements
- 2.2: Installation
- 2.3: Backend
- 2.4: Frontend
- 3: Usage
- 3.1: Page Overview
- 3.2: General Index Page
- 3.3: Player Management
- 3.4: Game Specific Index
- 3.5: Game Setup Page
- 3.6: Scoreboard
- 3.7: Controller
- 4: Deploy
- 4.1: Docker Deployment
- 4.2: Manual Deployment
- 4.3: Webserver setup
- 5: Develop
- 6: API
- 7: FAQ
1 - Overview
Get started with DaSCR-Board, the score tracking app.
Get up and running in no time.
What is it?
DaSCR-Board is a score tracking app written in go and SvelteKit. It consists of a RESTful backend api and a webfrontend.
Why do I want it?
You are tired of typing in the score when playing darts? So this one might be for you.
-
What is it good for?: DaSCR-Board can keep your darts score while playing darts for you. You can use it with a recognition software to automate the process or you can use it like any other darts scoring app. You can even host it online to play network games with your friends.
-
What is it not good for?: If you want to keep track of statistics and such this one might not be for you. Also it is not preventing one from typing in scores for other players during game.
-
What is it not yet good for?: Features who are about to be implemented in the future are certainly more games.
Where should I go next?
- Getting Started: Get started with DaSCR-Board
2 - Getting Started
Get ready to install things :D
This project requires basic command line knowledge
This section will lead you through different steps to get up and running in not time.
- Checking Prerequirements
- Getting the code
- Installing dependencies
- Building Backend and Frontend
This guide assumes you are using linux. The instructions easily transfer to other operating systems if you know your way around the tools used.
2.1 - Prerequirements
Checking and installing prerequirements
For this software to work you will need a few prerequirements:
- Git
- Go
- Nodejs
- Yarn
Git
You will need to have git to checkout the code we will use to build the software. As an alternative you could just download the main branch as .zip file and unzip it instead.
I am using the current git version:
❯ git --version
git version 2.30.0
Go
The backend is written in go. So you will need to get that and install it for your operating system. The version of go I am using as the time of writing is:
Attention
As I am using the embed package introduced with go 1.16 it is a requirement to use at least this version of go.❯ go version
go version go1.17 linux/amd64
GCC
The backends sqlite library needs to use CGO. That’s why you will need gcc on your system. The version I use is:
❯ gcc -v
--- output ommited ---
gcc version 11.1.0 (GCC)
Read more about CGO here
NodeJS & npm
The frontend is written in SvelteKit. Therefore you will need to get NodeJS to build it. I am also using pnpm as a package manager. The Makefile which we will use in the next step is using pmpm. Therefore I recommend installing and using it.
As the time of writing I am using the following versions:
❯ node --version
v14.17.5

❯ pnpm
Version 6.13.0
All Prerequirements met?
Continue with the basic setup:
- Installation: Fetch the code and do a basic setup
2.2 - Installation
Fetch the code and install DaSCR-Board
Fetch the code
Navigate to a folder where you want the app to reside in and clone it’s repository using git (or unzip the master.zip downloaded from GitHub Repo there):
git clone https://github.com/dascr/dascr-board
cd dascr-board
Content of the root directory
As this is a monorepo where the backend and the frontend reside, it might be a bit confusing at first. But fear not as I will describe how that works now.
.
├── api
├── config
├── database
├── docker-compose.yml
├── Dockerfile
├── frontend <--- Frontend App (SvelteKit)
├── game
├── go.mod
├── go.sum
├── LICENSE
├── logger
├── main.go
├── Makefile
├── player
├── podium
├── README.md
├── score
├── settings
├── throw
├── undo
├── uploads
├── utils
└── ws
Everything except the frontend folder is the backend app. The frontend Svelte app resides in the frontend folder. It is that easy.
Content of frontend folder for reference:
.
├── caddy
├── Dockerfile
├── jsconfig.json
├── node_modules
├── package.json
├── postcss.config.cjs
├── src
├── static
├── svelte.config.js
└── tailwind.config.cjs
DaSCR is using “.env”
What does that mean? There are different variables which are not read from a config file, but which are read from the environment. So you could for example do this:
export API_IP=0.0.0.0
This would set the variable API_IP used by the backend for this very session of your terminal. To ease the pain I am using .env files with my Makefile. Consider this as a kind of a config file itself.
So to use the Makefile you will need to create two files.
Backend
In the root folder of the project create a fille called .env. The content of it is:
API_IP=0.0.0.0
API_PORT=8000
DEBUG=FALSE
Here is the explanation of the content:
- API_IP: This one will determine to which ip address the backend server is bound to.
0.0.0.0means to any interface address. It could also read something like192.168.1.Xto bound it to a local network address. - API_PORT: This one will determine to which port the backend server is bound to.
- DEBUG: This one will control how much output the application is giving you. Most of the time the value
FALSEis good enough. But if you want to develop this you might want to chooseTRUEinstead.
Frontend
In the frontend folder also create a file called .env. The content of it is:
VITE_API_URL=http://localhost:8000/api
VITE_API_BASE=http://localhost:8000/
VITE_WS_URL=ws://localhost:8000/ws
This example reflects hosting it on a system in host only mode. You will not be able to use it other than on the system itself this way.
Here is the explanation of the content:
- API_URL: This one points to the api endpoint of the backend which is protocol://ip address:port/api
- API_BASE: This one points to the base address and has to match everything above but leaving out
/api - WS_URL: This one points to the websocket endpoint of the backend. Instead of
apiit should readws
Attention
You will need to set those before building or running in dev mode. This settings should reflect your infrastructure. If you are serving the app from a publicly available server it might read either an ip address or a domain name instead oflocalhost.
Checked out code and created .env * 2?
Continue with building either one of those:
2.3 - Backend
Build the Backend API
Attention
As I am using the embed package introduced in go version 1.16 it is a requirement to use at least this version of go.Build using Makefile
To build the backend you can simply use the provided Makefile. Possible make targets to build the backend are:
- build-linux_64
- build-linux_386
- build-mac
- build-armv5
- build-armv6
- build-armv7 (Raspberry Pi 3 + 4)
- build-armv8_64
So if you want to build on linux you for example issue:
❯ make build-linux_64
[*] go mod dowload
[*] Building for linux x64
[OK] App binary was created!
[OK] Your backend binary is at ./dist/<os>/
Now you have a binary ready to use:
dist
└── linux_amd64
    └── dascr-board
Windows?
In Windows you can also build this project. I tested it using MSYS2. After installing this I followed this instructions to setup my MSYS2 environment.
After setting up accordingly you can build like (from root directory of project within MSYS2 cli):
go mod download
go build -o dist/windows_amd64/dascr-board.exe
Warning
As the executable depends on environment variables I have not yet ran the executable successfully as I do not know how to use env vars in windows. If someone knows shoot me a mail!What’s next?
You could either run it right now using the Makefile (which will use the previously created .env file) and issue make run-dev-backend or run it like so (from the ./dist/<os>/ folder):
API_IP=0.0.0.0 API_PORT=8000 DEBUG=FALSE ./dascr-board
Want to have a Web UI?
- Frontend: Go ahead and build the frontend
2.4 - Frontend
Build the Frontend Web UI
Build using Makefile
Your best bet is to use the Makefile on this, too. Just issue:
❯ make build-frontend
[*] Cleanup SvelteKit App
[OK] Cleanup done
[*] Building SvelteKit App

> dose@1.0.0 tailwind:build
> cross-env TAILWIND_MODE=build cross-env NODE_ENV=production postcss src/styles/tailwind.css -o src/styles/tailwind-output.css

warn - You have enabled the JIT engine which is currently in preview.
warn - Preview features are not covered by semver, may introduce breaking changes, and can change at any time.
Source path: redacted
Setting up new context...
Finding changed files: 3.293ms
Generate rules: 32.227ms
Build stylesheet: 0.688ms
Potential classes:  2550
Active contexts:  1
Content match entries 1126
JIT TOTAL: 113.848ms

> dose@1.0.0 build:only
> svelte-kit build

[... snip ...]

3:56:22 PM [vite-plugin-svelte] The following packages did not export their `package.json` file so we could not check the "svelte" field. If you had difficulties importing svelte components from a package, then please contact the author and ask them to export the package.json file.
- ky
✓ 103 modules transformed.

[... snip ...]

[dotenv][DEBUG] did not match key and value when parsing line 4:
vite v2.5.1 building SSR bundle for production...
transforming (70) .svelte-kit/build/runtime/internal/singletons.js

[... snip ...]

3:56:25 PM [vite-plugin-svelte] The following packages did not export their `package.json` file so we could not check the "svelte" field. If you had difficulties importing svelte components from a package, then please contact the author and ask them to export the package.json file.
- ky
✓ 105 modules transformed.
.svelte-kit/output/server/app.js   329.07 KiB

Run npm run preview to preview your production build locally.

> Using @sveltejs/adapter-static
  ✔ done
[OK] SvelteKit App was built
[OK] Serve content of ./frontend/build via a webserver
Content of the build folder for reference
.
├── _app
├── css
├── favicon.ico
├── fonts
├── img
├── index.html
├── js
├── player
├── sounds
└── webfonts
What’s next?
Now everything left to do is to server the content of frontend/build via a webserver like Apache2, Nginx or Caddy2.
You could instead also run it right now using the Makefile (which will use the previously created .env file in frontend folder) and issue make run-dev-frontend.
Ready to throw darts?
- Usage: Use it
- Deploy: Deploy a production build
- Development: Contribute
- API: What does the API do?
3 - Usage
How do I use it?
This section will tell you how to use DaSCR-Board
This section will lead you through different steps to setup player and run games.
- Managing player
- Choose your ID
- Setup a game and start
- Different views
3.1 - Page Overview
What pages are there?
TL;DR?
- Setup a player at
/player - Start a game at
/<your-game-id>/game - Point the scoreboard browser to
/<your-game-id>/scoreboard - Point the browser you want to add in throws with to
/<your-game-id>/controller - Enjoy
The pages
There are different pages you can navigate to when using DaSCR-Board. After setting up your players you will only be needing to navigate to two pages, though. Here is an overview of the different pages one can go to:
- General Index
- Player Management
- Game Index
- Game Setup and Start
- Scoreboard
- Controller
Choose the page you want to learn about in the navigation menu on the left.
For the ease of writing I will refer to the pages with url paths and ommiting the part http://localhost:8000.
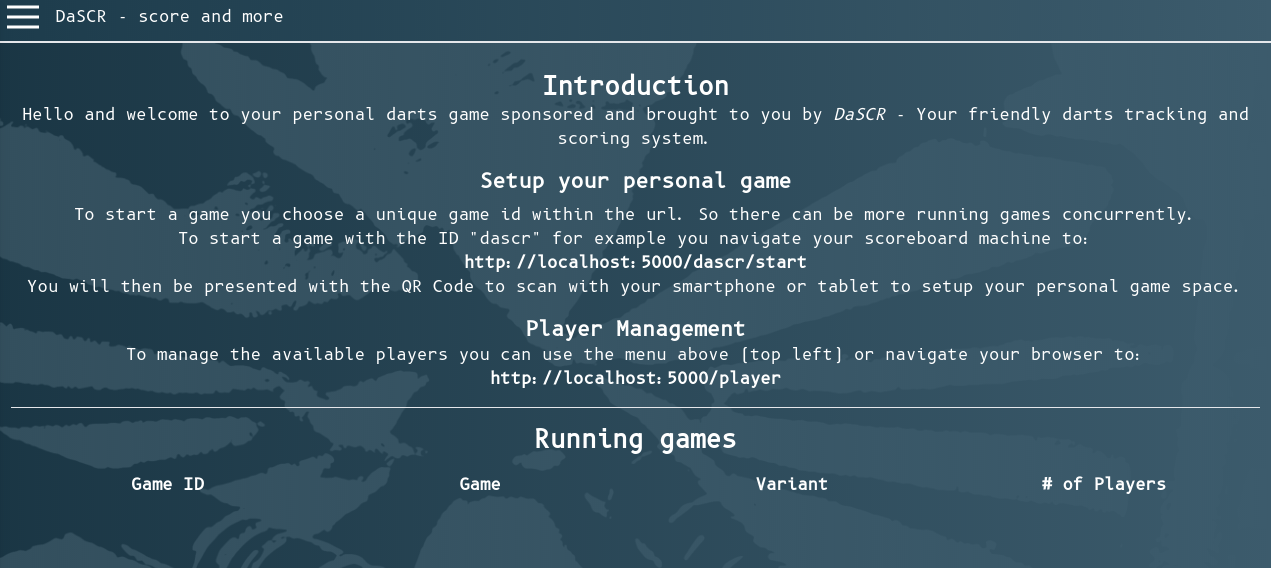
3.2 - General Index Page
This page is the one you might see first
Path
You can see this page at /. It will let you have an overview of the different games running in the table at the page bottom. Also it will give you short instructions on how to start. The navigation symbol top left lets you navigate through different pages.
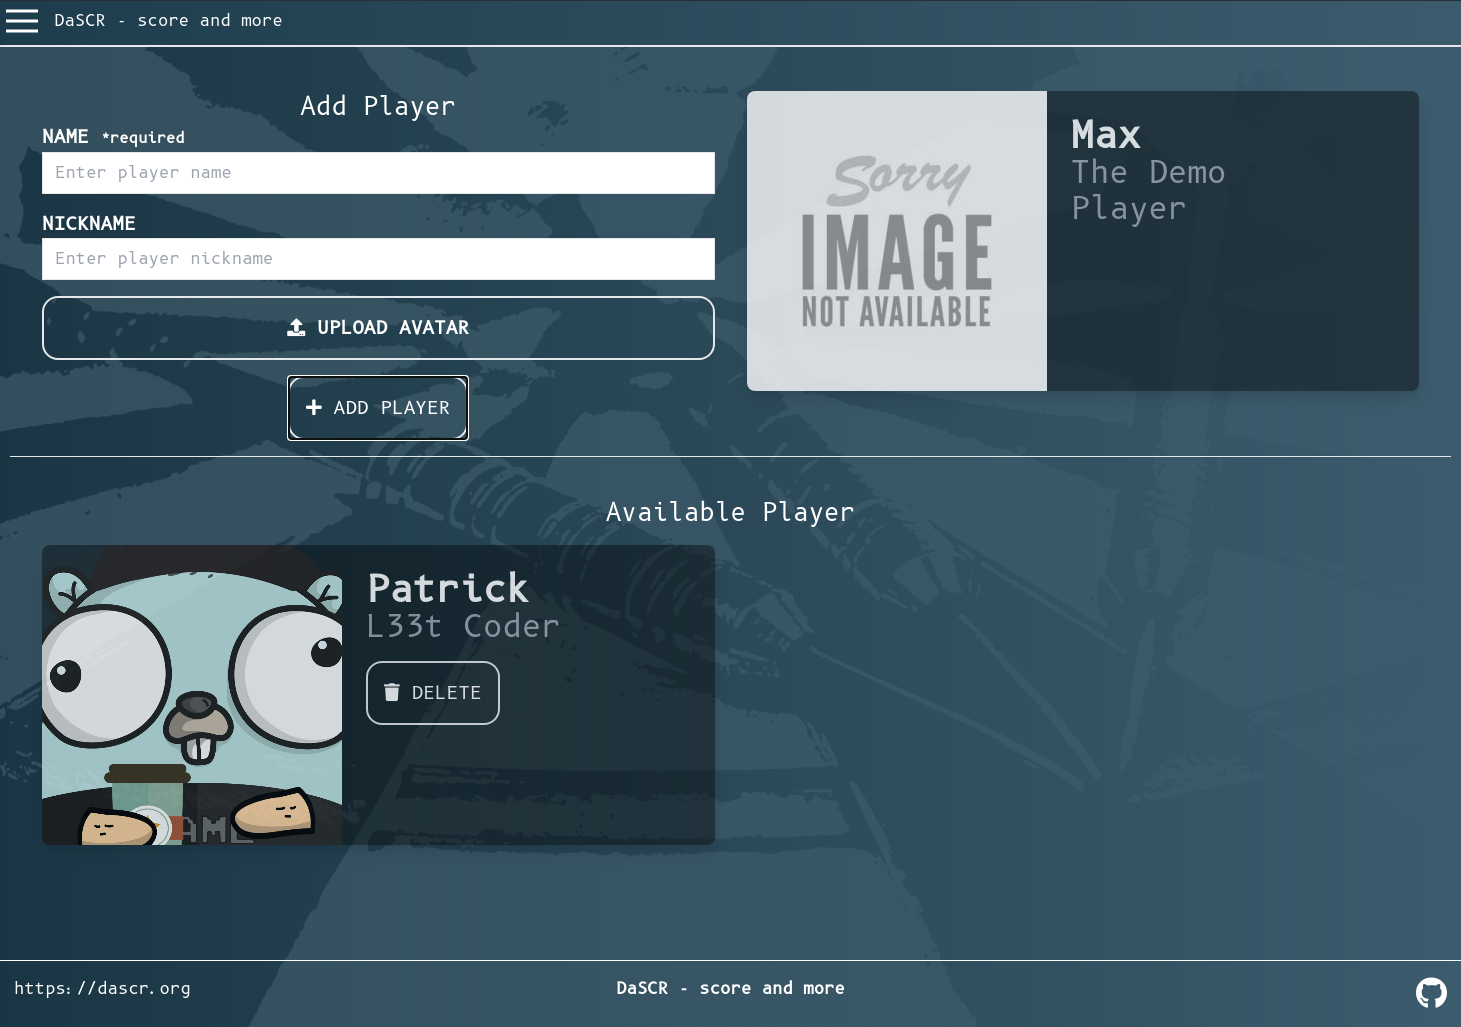
3.3 - Player Management
This page will let you manage players
Path
You can see this page at /player. It will let you add and remove player to the machine. There is no gameid specific player management. So all players added will be available to choose.
Add
Add a player by insterting the name and the nickname (optional) in the corresponding form fields. You may want to upload a avatar picture. If so you can scale it in the players preview card to the right of the creation form using the mouse.
If you do not upload an image one out of 9 animal avatar images will be chosen randomly.
Delete
You can delete a player by hitting the Delete button in the available player card.
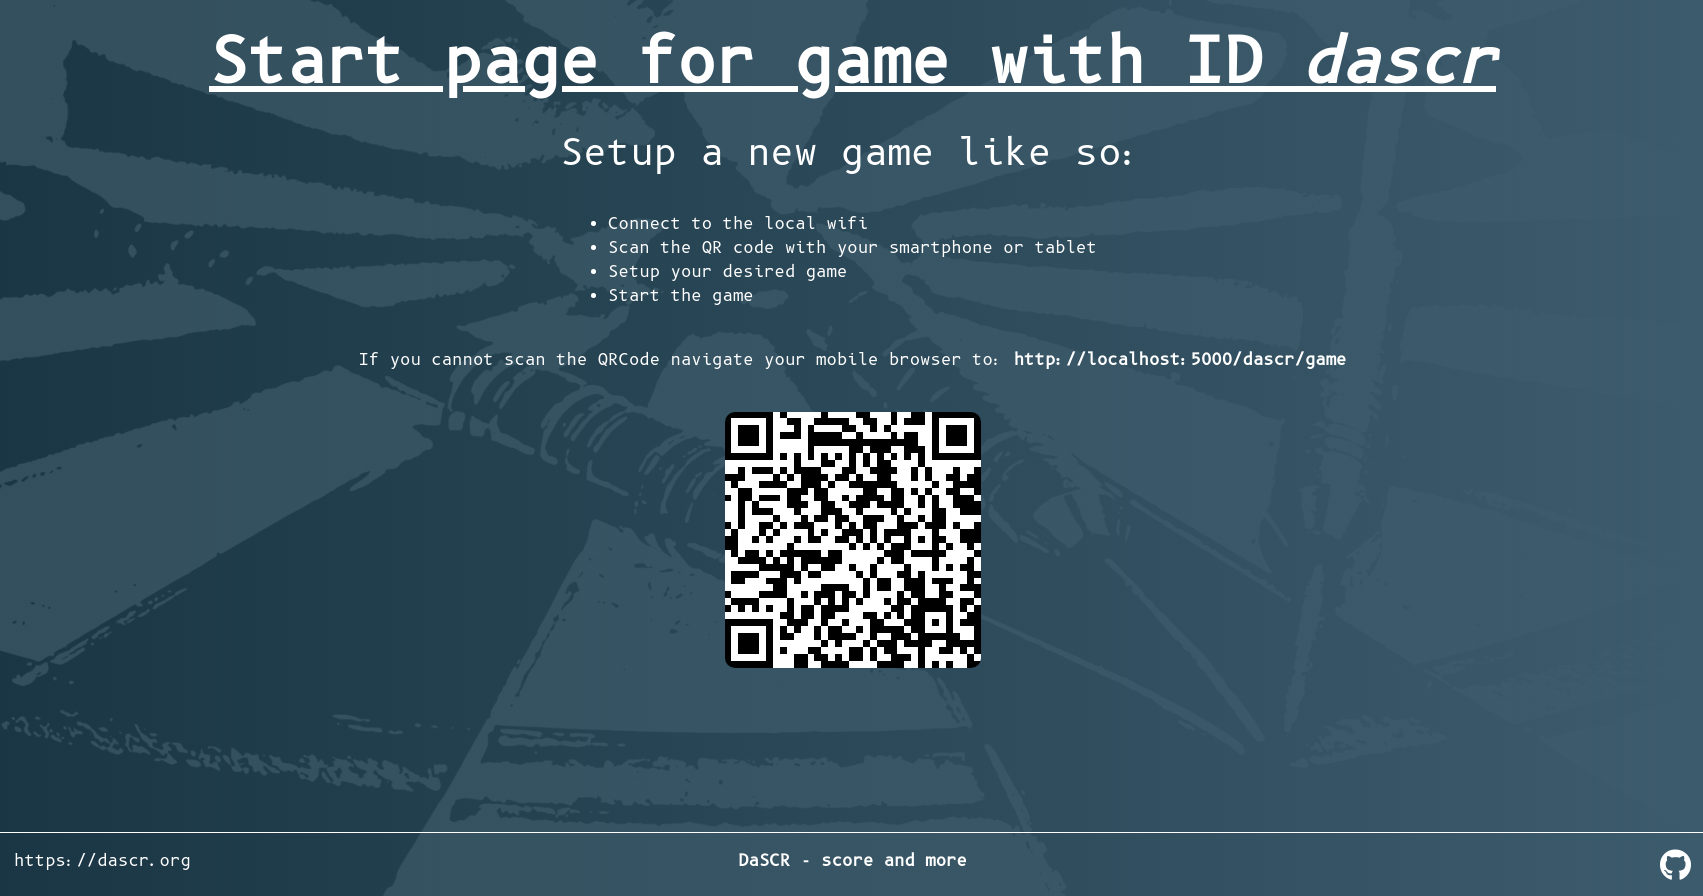
3.4 - Game Specific Index
This page is the game index page of a specific game id
Path
You can see this page at /<game-id>/start. This page is supposed to be displayed at a big screen where everyone can see it. You can for example hang a big screen right above the dart board at the front or maybe use a projector to beam this page on a wall.
Purpose
This page can let your players scan the QR code with a smartphone for example and then setup a game. After starting a game this page will automatically redirect to the corresponding scoreboard page and show the score of the ongoing game.
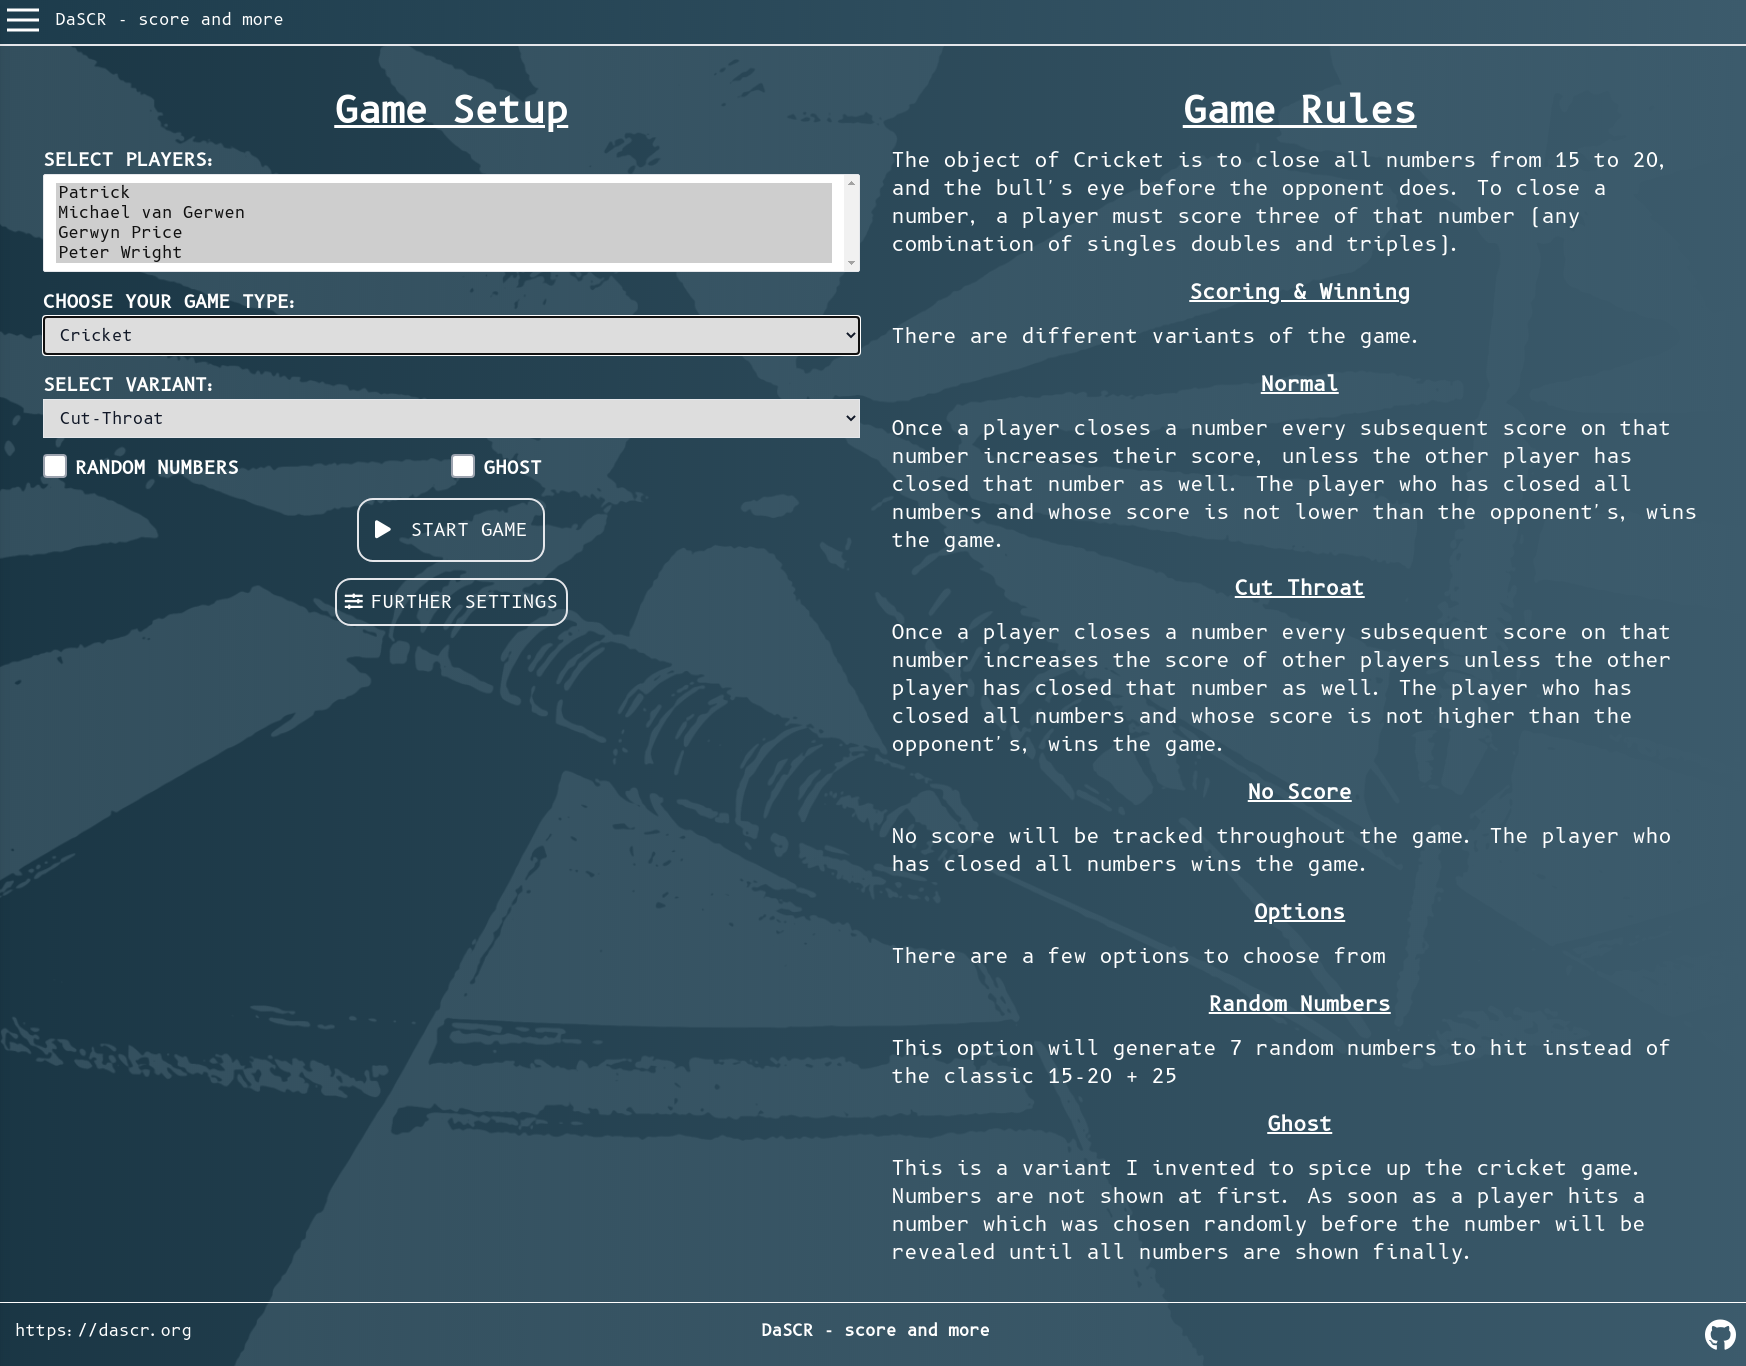
3.5 - Game Setup Page
This page is the game setup page of a specific game id
Path
You can see this page at /<game-id>/game. This page is supposed to be displayed at a small screen like the one of a smartphone or tablet.
Purpose
The page will let you setup the game you want to play and also show you the rules which are applied to the game. After starting a game this page will automatically redirect to the corresponding controller page and let you handle the game.
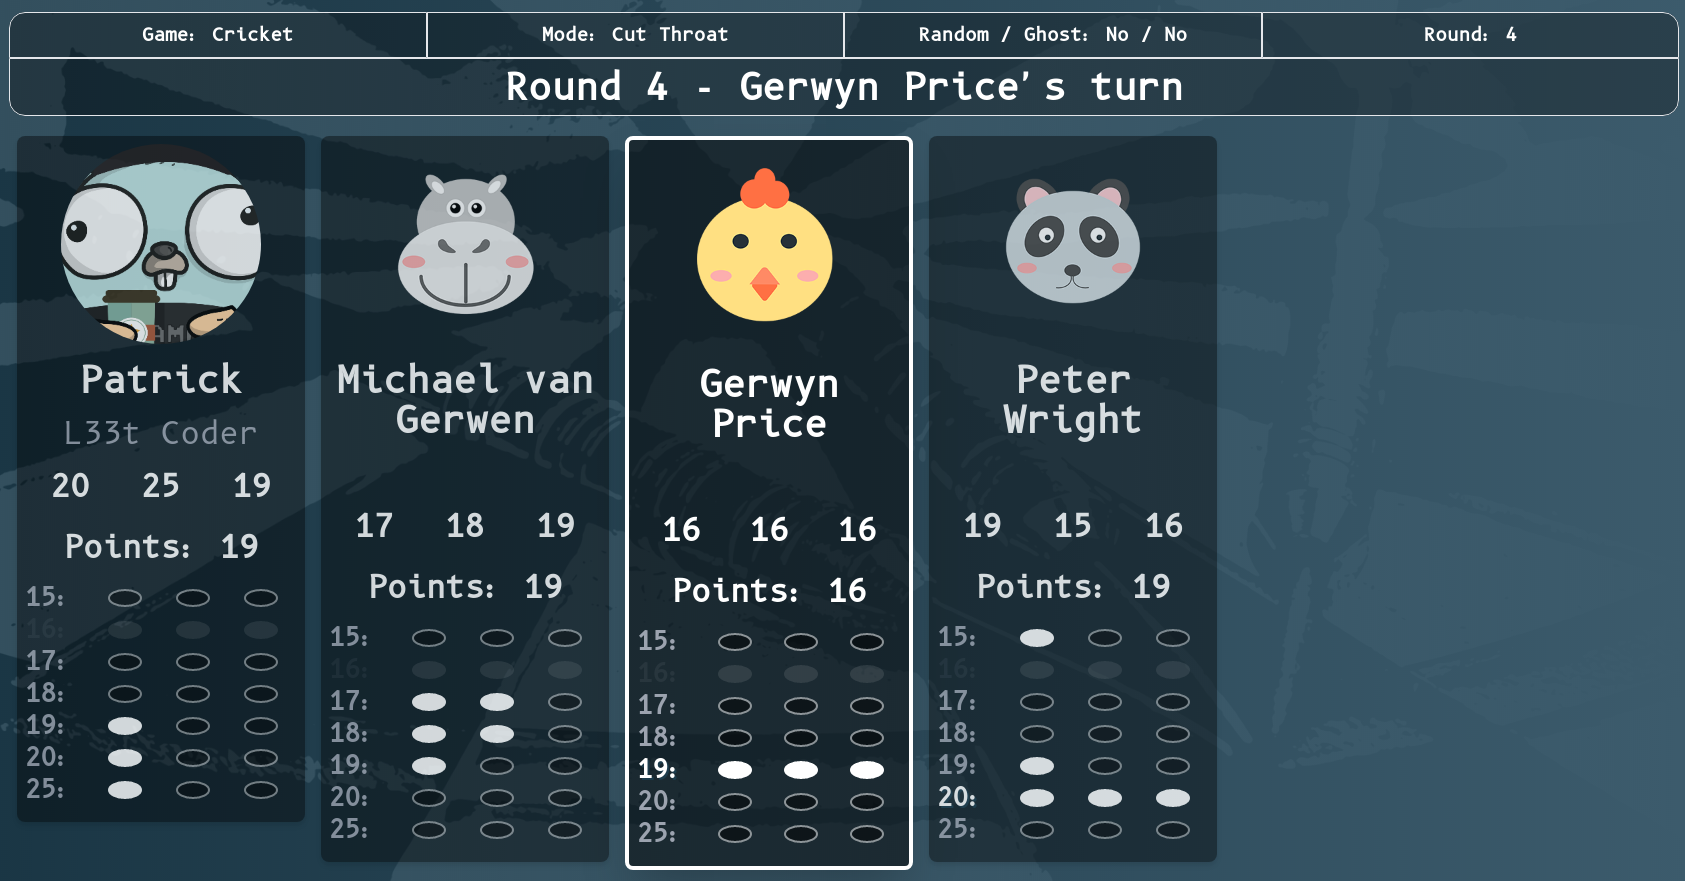
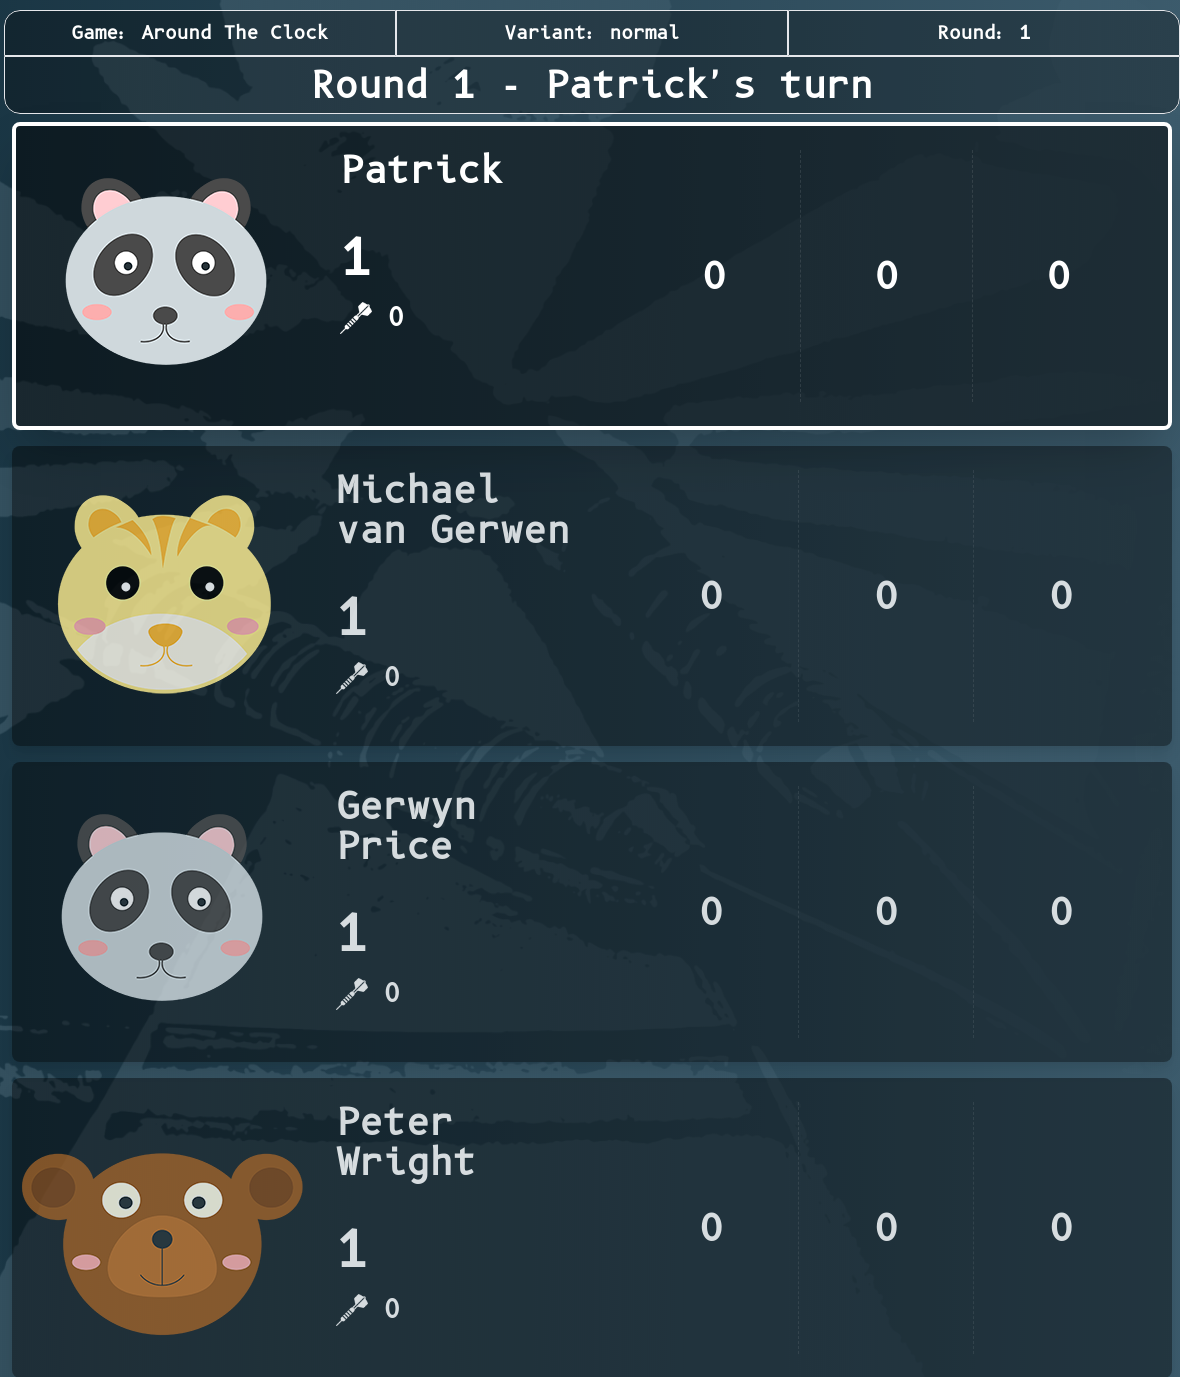
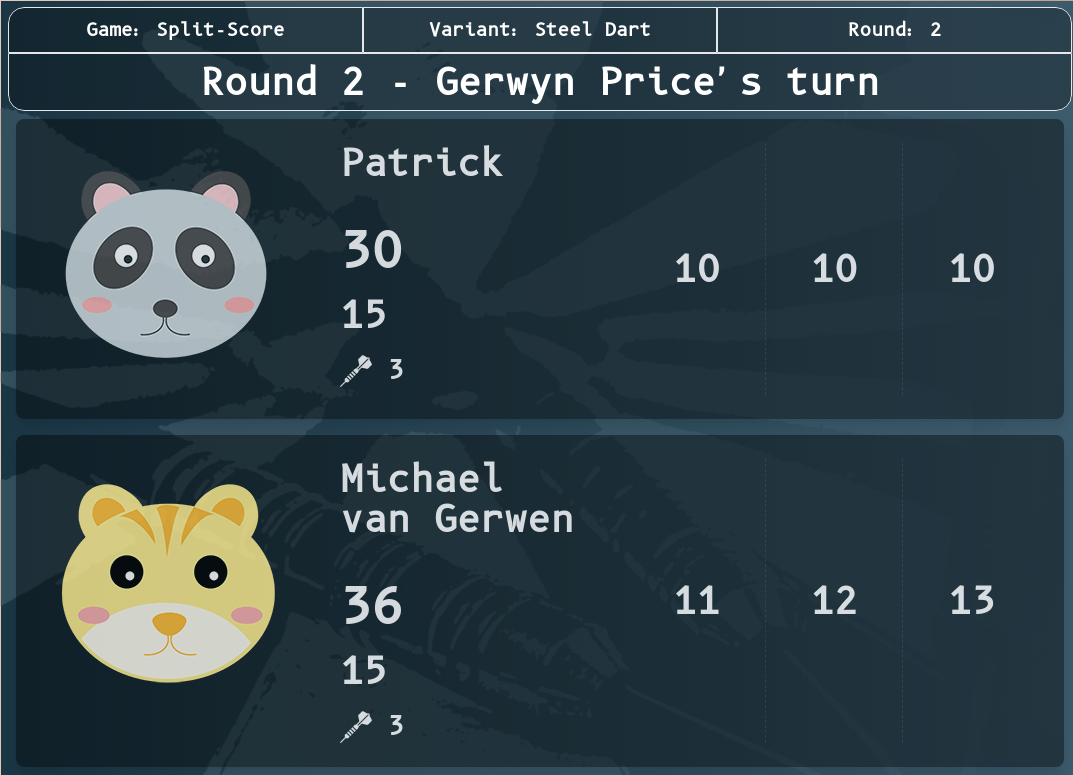
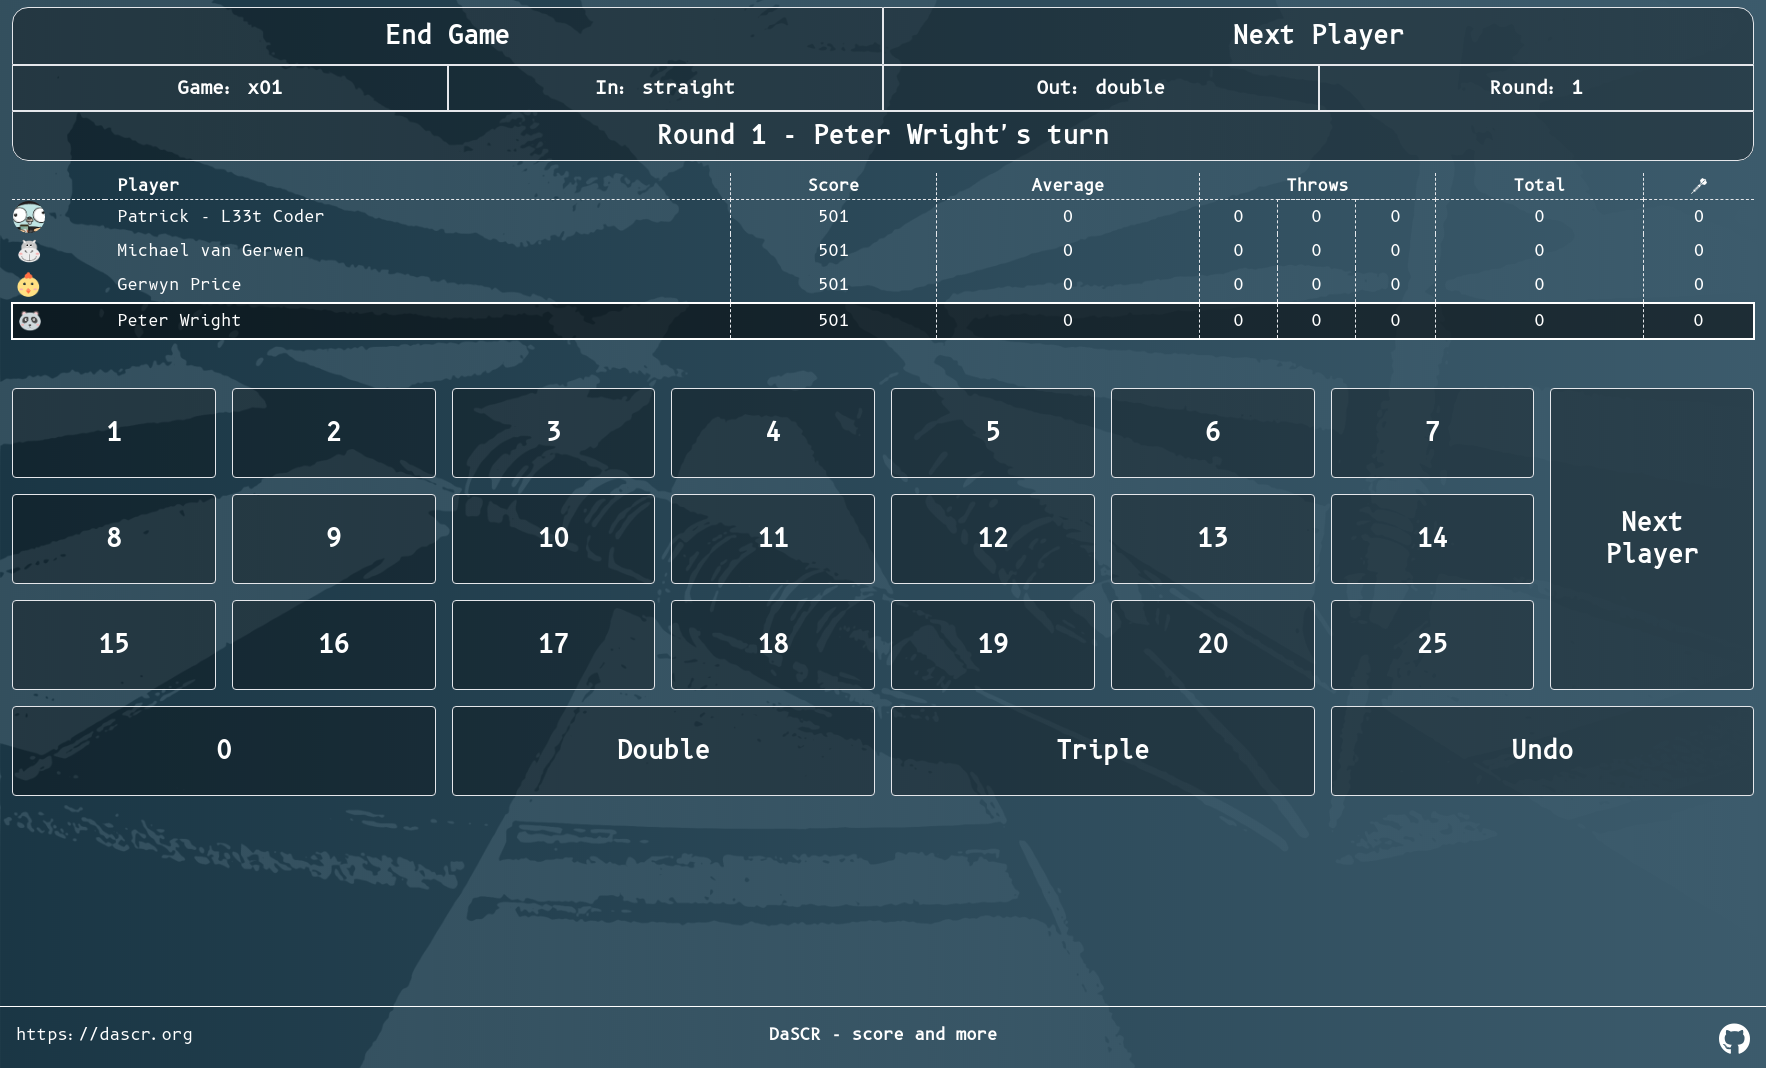
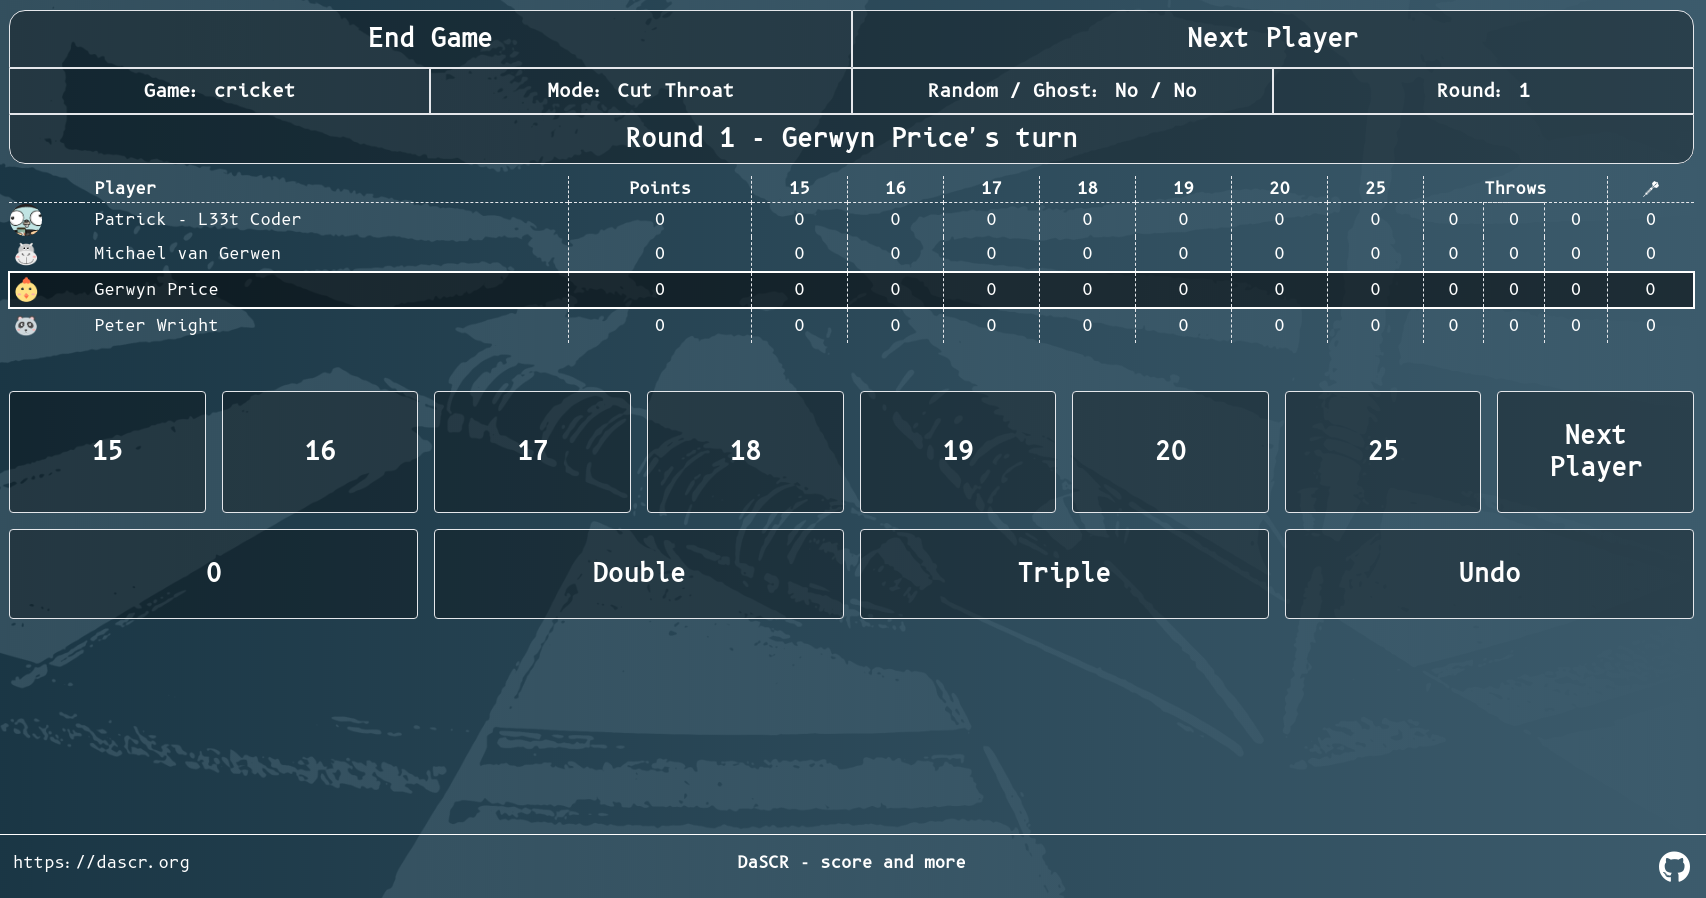
3.6 - Scoreboard
This page is the scoreboard of a specific game id
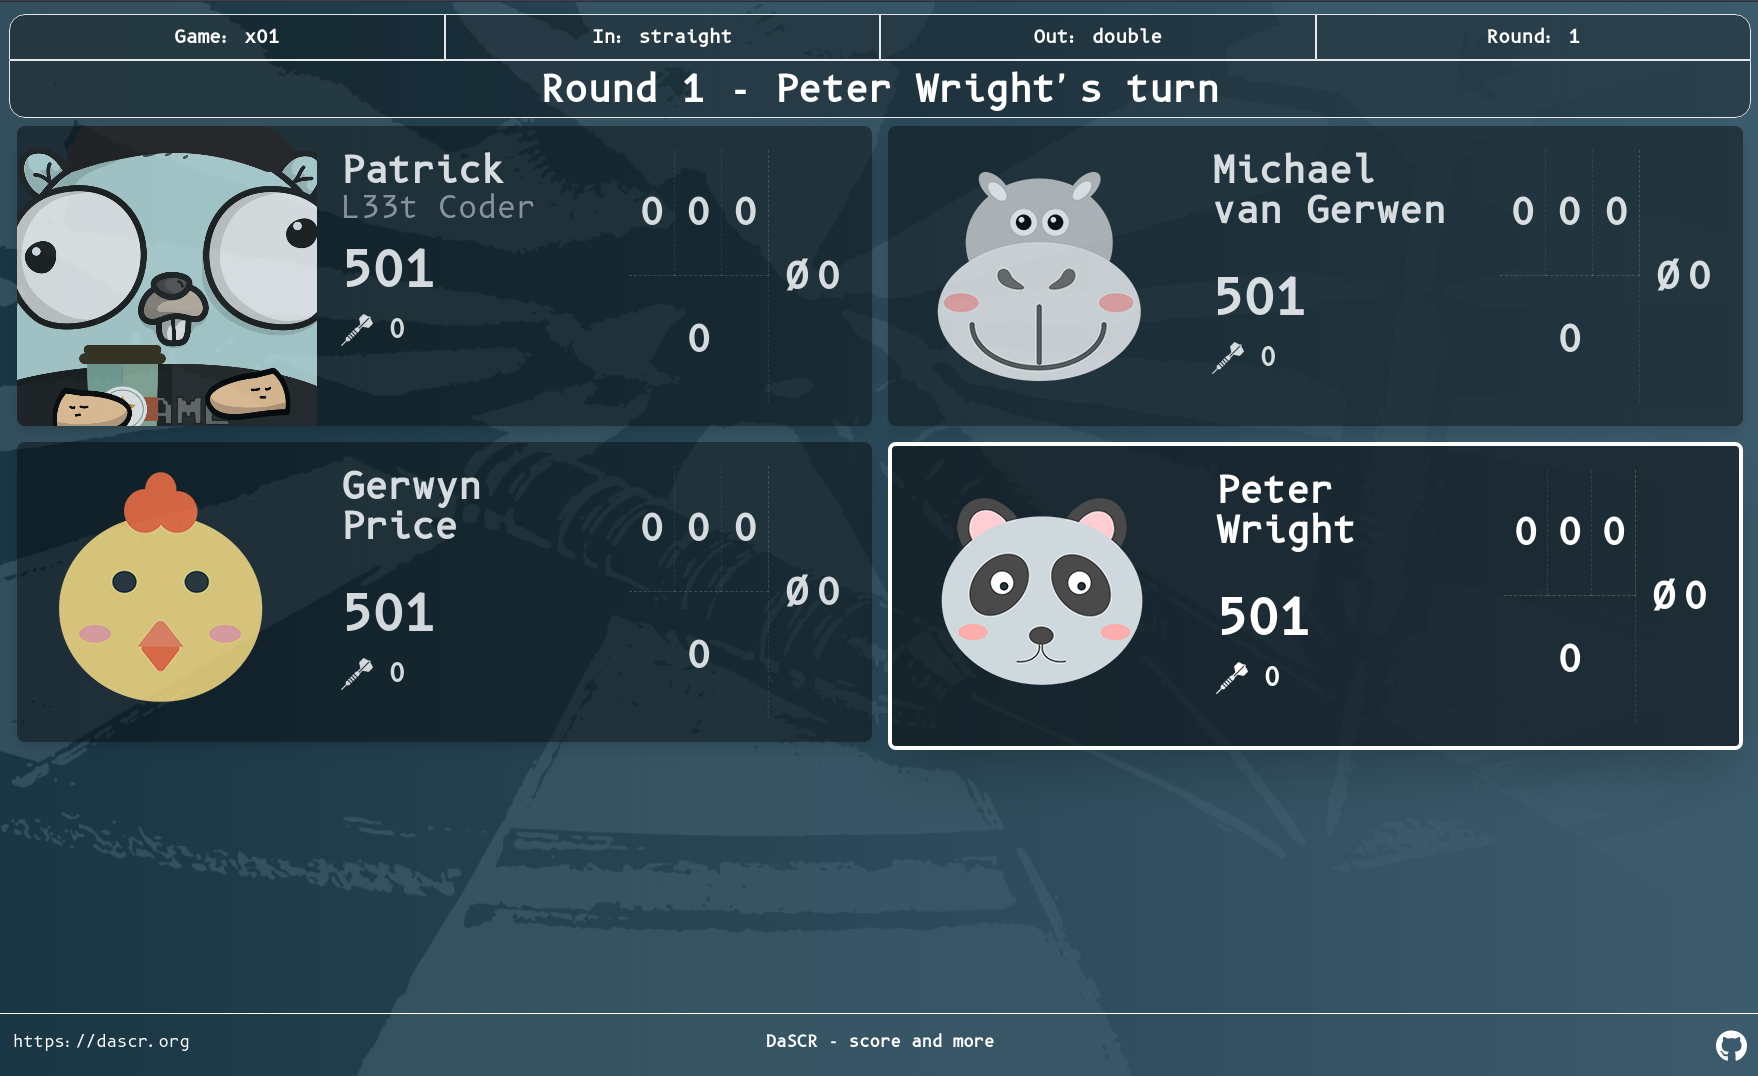
Path
You can see this page at /<game-id>/scoreboard. This page is supposed to be displayed at a big screen at the front.
Purpose
The page will let you see the score of a game. It will also look different for every gametype you choose. After ending a game it will automatically redirect back to the game specific index page and waits for another game to start.
Further Screenshots
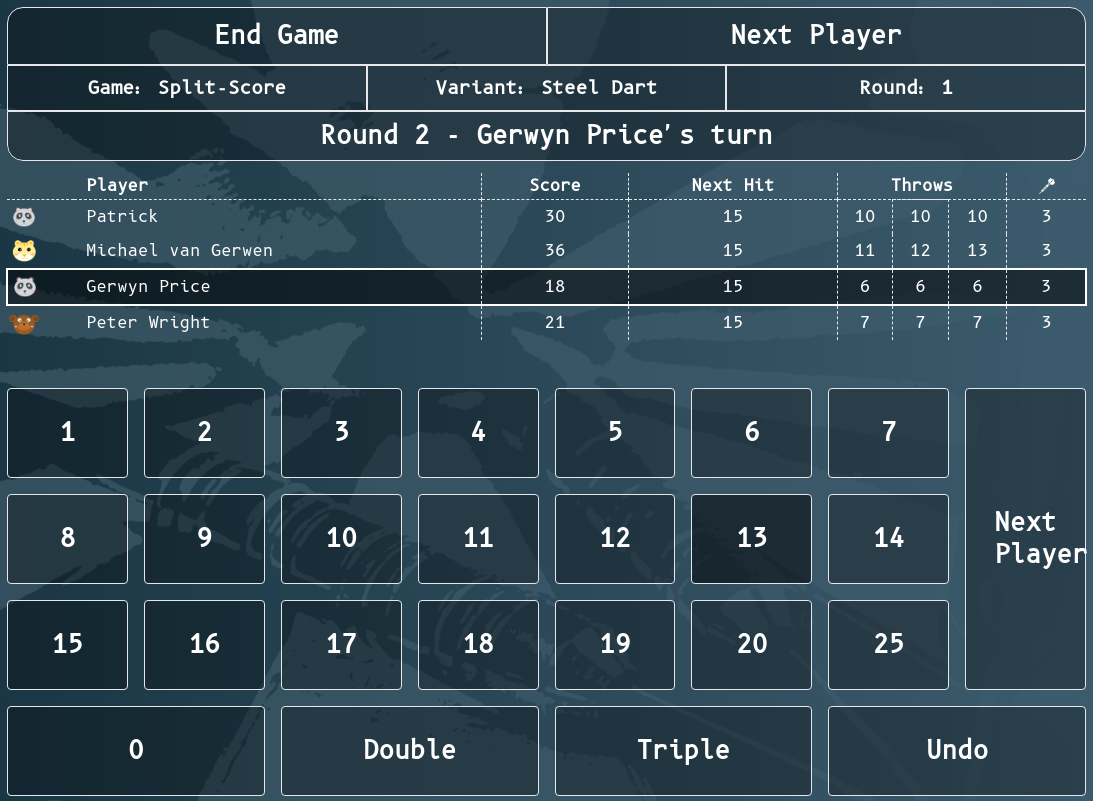
3.7 - Controller
This page is the controller of a specific game id
Path
You can see this page at /<game-id>/controller. This page is supposed to be displayed at a small screen like a smartphone or a tablet.
Purpose
The page will let you control the game, insert throws, undo actions and end the game. see the score of a game. It will also look different for every gametype you choose. After ending a game it will automatically redirect back to the game setup page and let you start another game.
Further Screenshots

4 - Deploy
Learn how to use it in production
Choose from an option and deploy
Options
You can either deploy it using Docker or you do it by hand. As you may already have built the project following the getting started instructions you can also do it by hand.
Example Environment
The two described options docker and manual will be using an example environment you can relate to.
The environment will be described in this section.
Consider a root server running Debian hosted by a provider online. You have root access to it via ssh and you have a domain pointing towards the public IP of this root server. Let’s assume the domain you own is dascr.org.
❯ host dascr.org
dascr.org has address 45.142.179.121

patrick@ssh-dascr-org ❯ pwd
/home/patrick/projects/dascr-board
You already at least have the prerequirements setup and cloned the code to disk on this root server.
Now you might wanna look at one or both of the deployment options then.
4.1 - Docker Deployment
How to use docker do deploy it
Instead of building everything by hand like described in the getting started guide you can also use docker.
Locally
There are two Dockerfiles, one in the root of the directory and one in the frontend directory. Those will build two independant docker images you can run like this:
docker build . -t dascr-board-backend
docker build ./frontend -t dascr-board-frontend
Running it
When running you need to be sure to let them run in the same network and to expose the corresponding ports (5000 - frontend, 8000 - backend) to be able to use the container.
Docker-Compose
As there is a docker-compose-local.yml in the root folder you can do all of this by just issuing:
docker network create dascr
docker-compose -f docker-compose-local.yml up
WARNING
This will run the scoreboard in a way where it will only be functional when browsed to from the host you are running it on.Different IP Address than localhost
By default the procedure above will build the docker image in a way where the scoreboard will only work on the system it was built on. If you need to separate the “viewing client” from the client running the scoreboard, you will need to use the Makefile to build and first run the docker image.
Step 1 will be to create a file called .env in the folder frontend as described at Installation#Frontend and fill in the corresponding ip address of the host running the scoreboard. Then you issue make run-docker for the customization to be applied at build time.
It should run the Scoreboard on port 8080 on that ip you chose and also it should be reachable and functional from within your network.
For the second startup docker-compose -f docker-compose-local.yml up should be enough.
Docker Release Image
If you do not want to build the docker images yourself this repository also has the latest version as an Release Package. I provide the file docker-compose-repo.yml for easy running as well.
docker network create dascr
docker-compose -f docker-compose-repo.yml up
After a successful startup you can access the web ui at port 8080.
WARNING
This build will only work for running and viewing the Scoreboard from one and the same host. If you need to access the scoreboard from another host in the network, you will need to run the procedure described above.What’s next?
When running the container successfully you can continue with webserver setup.
- Caddy2: You might wanna continue setting up caddy2 server to serve the frontend UI
4.2 - Manual Deployment
How to build and autostart DaSCR-Board using systemd
Basically it is as easy as running through the getting started guide on your remote server.
Notice
Be sure to do the .env files right when going through the getting started guide. Referring to the example environment you can see my .env files here:
./.env
API_IP=0.0.0.0
API_PORT=8000
DEBUG=FALSE
./frontend/.env
VITE_API_BASE=https://dascr.org/
VITE_API_URL=https://dascr.org/api
VITE_WS_URL=wss://dascr.org/ws
Autostart backend using systemd
If you have successfully built the backend and the frontend you will have the backend binary in place and the public folder for serving with for example caddy2.
You can now use this systemd service file to automate the startup of the backend binary like so:
[Unit]
Description=DaSCR Board - Backend API
After=network.target

[Service]
Type=simple
User=patrick
Group=patrick
Restart=always
RestartSec=5s

Environment=API_IP=0.0.0.0
Environment=API_PORT=8000

WorkingDirectory=/home/patrick/projects/dascr-board
ExecStart=/home/patrick/projects/dascr-board/dist/linux_amd64/dascr-board
SyslogIdentifier=dascr-board

[Install]
WantedBy=multi-user.target
Save it at /etc/systemd/system/dascr-board.service.
Then run:
sudo systemctl daemon-reload
sudo systemctl start dascr-board
sudo systemctl enable dascr-board
Now the service should be up and running and be started at system boot time automatically.
You can check running sudo systemctl status dascr-board.
What’s next?
- Caddy2: You might wanna continue setting up caddy2 server to serve the frontend UI
4.3 - Webserver setup
How to use caddy2 to serve the frontend UI
This section can also be solved using Apache2 or Nginx. I personally like Caddy2 much so I used it to deploy it. Therefore I will show my config as an example here.
You will need to install it yourself, though. It is kinda easy, I guess.
Caddyfile
My caddy file written to /etc/caddy/Caddyfile looks like this:
dascr.org {
	root * /home/patrick/projects/dascr-board/frontend/build
	encode gzip

	handle /api/* {
		reverse_proxy localhost:8000
	}

	handle /images/* {
		reverse_proxy localhost:8000
	}

	handle /uploads/* {
		reverse_proxy localhost:8000
	}

	handle /ws/* {
		reverse_proxy localhost:8000
	}

	handle {
		try_files {path} {file} /index.html
		file_server
	}

	header {
	# enable HSTS
	Strict-Transport-Security max-age=31536000;

	# disable clients from sniffing the media type
	X-Content-Type-Options nosniff

	# clickjacking protection
	X-Frame-Options DENY

	# keep referrer data off of HTTP connections
	Referrer-Policy no-referrer-when-downgrade
	}

	log {
		output file /var/log/caddy/dascr-board.log {
			roll_size 1gb
			roll_keep 5
			roll_keep_for 720h
		}
	}
}
Running this config you should have the frontend up and running at the domain https://dascr.org.
Basic Auth
If you want to protect your page from beeing used publicly you can also apply basic authentication by generating a user:pass combination like so (’test’ is the password in this example):
caddy hash-password -plaintext test
JDJhJDE0JGw1Ti43eW8ycW5vVTc1TDZVbDZBc09XVnI2YVJmYkM1VlguV0lHL1RsMkNBejkvLlFBUFFx
You can also completely omit -plaintext ... and will be prompted to insert the password without it landing in the history of the server.
Then you add this configuration bit to the Caddyfile:
basicauth * {
		username JDJhJDE0JGw1Ti43eW8ycW5vVTc1TDZVbDZBc09XVnI2YVJmYkM1VlguV0lHL1RsMkNBejkvLlFBUFFx
	}
What’s next?
- Development: Wanna contribute? Have ideas? Go ahead!
- API: Wanna use your own recognition software? Read the API specs.
5 - Develop
You want to contribute? This one is for you.
I have way to less time to explain my code here. If you are thinking about adding features or fixing bugs I consider you are already familiar with go and JavaScript/SvelteKit, as well as the tooling used around developing backend and frontend services.
Disclaimer
Please notice that I am not a professional programmer myself. So if you find the code to be confusing or not good at all by not following best practice or yada yada, just shoot me a mail or do a pull request.I will take every pull request seriously. So go ahead, fork me, do your thing, create a pull request and I’ll review it.
6 - API
See the API documentation here
7 - FAQ
Those are the Frequently Asked Questions and known Bugs.
If you find something is behaving odd, you should look here first.
My Scoreboard page is not updating when entering score?
This might come from the fact, that dascr-board is now using sound. As the frontend is using an
awaitto resolve a so calledpromisewhen playing sounds the frontend will not get updated if the sound does not play properly. I discovered firefox and google chrome to sometimes prevent from playing sounds properly, thus the frontend is not updating at all. Make sure toallow sound and videofor the url (ip address) you are hosting you frontend with.